Right now, Steam is winning the gaming industry. However, many users face network connection problems, and you are one of them. But fret not, we have some method where you can fix it easily. Let’s see how we can fix this – could not connect to Steam network.
How to Fix Could Not Connect to Steam Network
Normally, it can be a network issue for sure of your internet and network or the server. You can see this error when you frequently change the game’s configuration. However, here is we got the error. There will be a fix as well. Without delaying time, jump into the process.
How to Fix Could Not Connect to Steam Network1. Troubleshoot the Internet Connection2. Restart the System3. Reinstall Steam4. Update Network Driver5. Disable Windows Firewall6. Update Steam Client7. Start Steam using TCP8. Run Steam as an Admin8. Disable VPN & Proxy NetworkFinal Words
1. Troubleshoot the Internet Connection
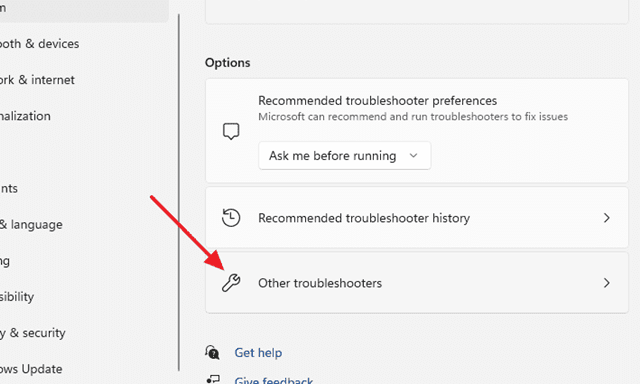
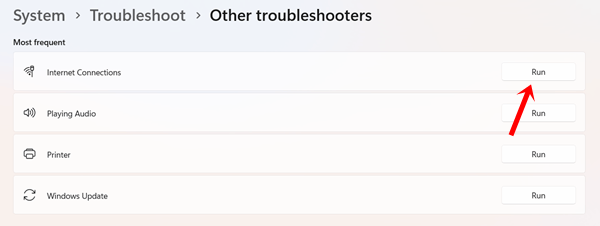
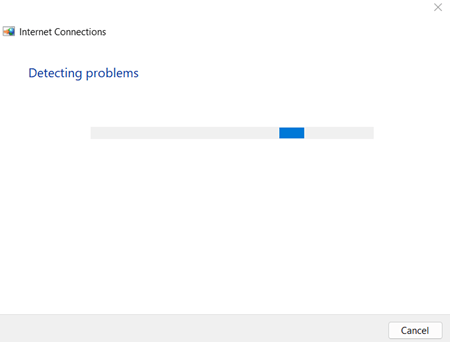
Detecting the possible problem is very easy in Windows 11, be it an internet connection or another issue. It will detect the problem and give a way to act upon it.
2. Restart the System
Restarting the system is one of the underrated processes to fix all problems like lagging, app crashing, driver issues, network problems, and many other issues. You can restart the system when you cannot connect Steam with an internet connection and check whether it is all fine or if you need to do more settings for it.
3. Reinstall Steam
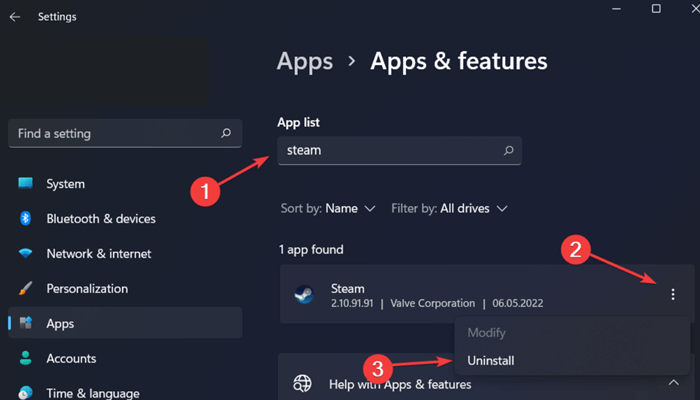
It is one of the best to solve the problem. Uninstalling the app clears out corrupt files and bugs, which may be the occurring problem in the same. It is even more easy to do.
4. Update Network Driver
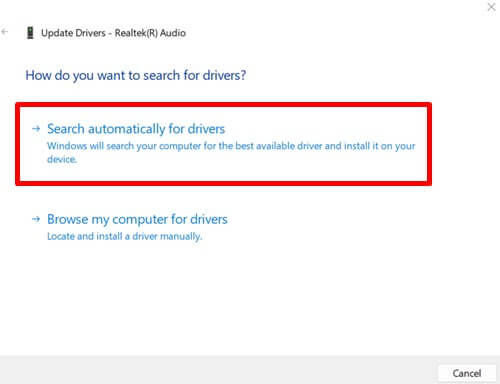
You can also update the network driver. An outdated network drive can be a reason for could not connect to the Steam network.
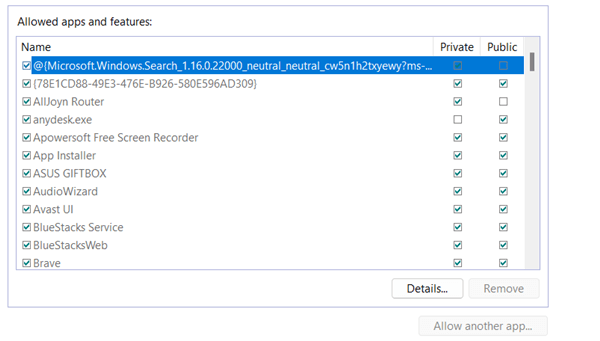
5. Disable Windows Firewall
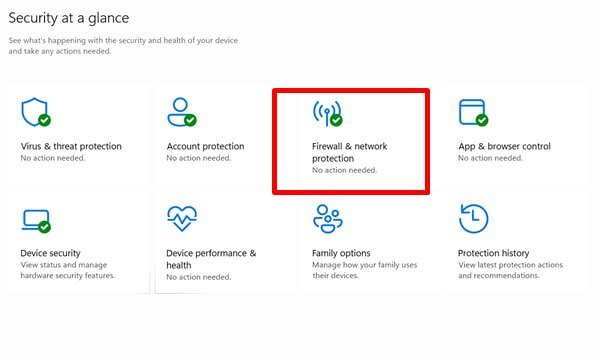
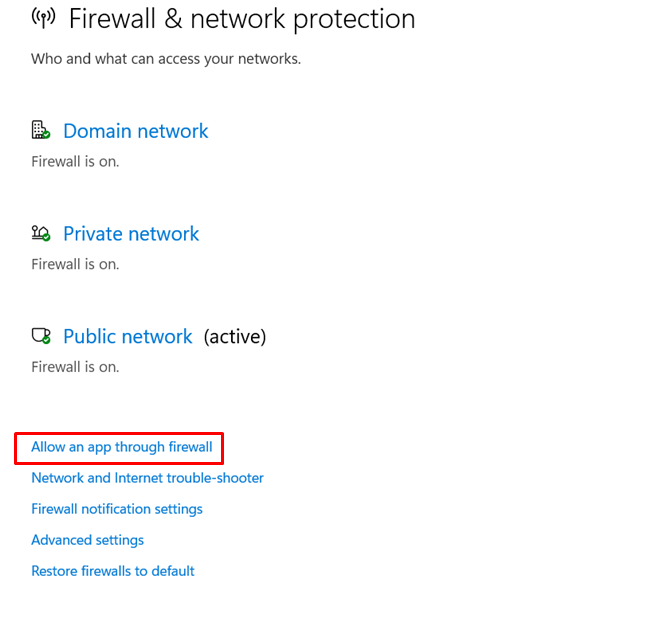
The firewall works as the security tool for all incoming and outcoming networks. It takes care of all of them and even unauthorized access. But they check whether the problem still exists by simply disabling the Windows firewall for a while.
6. Update Steam Client
A recommendation will be to use the updated version of any apps. It gives you more compatibility and smoothness, along with other features. If you have not updated the Steam client, the time has come to do so. It updates automatically, but it won’t in rare cases. Here is how to update the Steam client. First, open Steam, then select Steam, and now click Check for Steam Client Updates. That’s it. You can update the Steam client easily.
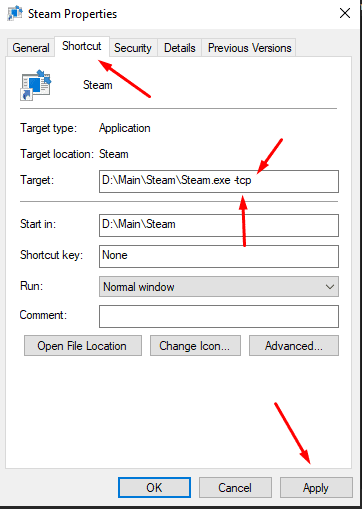
7. Start Steam using TCP
It may sound weird, but problems can lie down underneath TCP. Here’s what you need to follow.
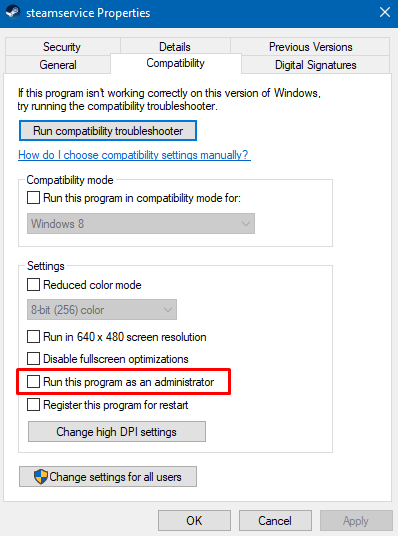
8. Run Steam as an Admin
Here is another considerable method that you can try to fix the issue.
8. Disable VPN & Proxy Network
Using a VPN or proxy network, your connection will go through the tunnel of the network where you can be untraceable. However, the Steam connection failed to recognize your IP and location. This could be another reason for showing the error message. Disable the VPN and proxy network. As Steam can run perfectly on normal internet connections. It might solve the error problem.
Final Words
This is how you can fix the issue of could not connect to Steam network. Although all methods are proven to fix the problem. If you have any problem now, let us know in the comment section.
